Driveway Pavers

driveway paving

SC Driveway Paving Charleston offers homeowners an alternative to traditional asphalt or poured concrete. When installed correctly, they can hold the weight of vehicles and withstand the winter climate. Homeowners can choose from pavers that look like rustic slabs, quaint cobblestone, or sleek slate. Color options are endless as well.

driveway paving

If you’re considering a new driveway, durability is a huge factor. After all, you want a material that will withstand heavy vehicle traffic and the elements. With pavers, you can choose various materials and styles to meet your needs. Whether you are looking for an authentic old-world design or a contemporary look, pavers can provide your desired aesthetic.

The strength of a paver driveway is due to its interlocking structure, which provides greater stability than poured concrete or asphalt. It allows the pavers to resist cracking and shifting in the long term, even with heavy vehicle or pedestrian traffic. In addition, the paving blocks can be easily removed and replaced if worn or damaged. It is much easier than replacing the driveway with another material like poured concrete or asphalt.

Driveway pavers are constructed with various materials, including clay, cement, and shale. They are usually laid on a compacted soil and stone base with sand between each unit for added strength. Then, mortar is applied to hold the pavers in place. A professional contractor will use a custom mix of artillery created for the climate and soil conditions where your project is located.

One of the most common paver types is concrete, manufactured from Portland cement and an aggregate mixture. These pavers are a great option for homeowners who want the look of a stone driveway without the cost. They also require very little maintenance, with occasional sweeping or hose rinsing. However, they can stain from oil and grease, which may need a cleaner or protectant.

Other types of pavers are made from natural stone, such as granite, slate, and flagstone. These are extremely durable but may be difficult to shovel if you live in a snowy area. The freeze-and-thaw cycle can also affect them, which can cause the stones to loosen. However, if the stones are properly installed and maintained, they can last much longer than a concrete or asphalt driveway.

Installing a new driveway allows homeowners to create a unique look that compliments their home. While poured concrete and asphalt are great options, pavers offer an attractive alternative that is easy to maintain. Unlike traditional driveway surfaces, which may crack and deteriorate over time, pavers can be easily replaced one by one without the need for heavy equipment or the entire surface to be redone.

Paver stones are available in various colors, sizes, and patterns, allowing homeowners to create a custom look for their driveway. They can also be laid out in multiple ways to create an interesting visual effect. In contrast, a standard concrete driveway is limited in its design options and cannot match the style of the house.

While a paver driveway is durable, it will still require maintenance to keep it looking its best. Regular sweeping with a broom or pressure washer keeps the surface clean. It helps prevent stains from dirt, oil, and other chemicals that can damage the pavement’s surface.

In addition, weed growth can cause cracks and gaps in the paving stones. It can be prevented by incorporating a layer of crushed rock into the base of the driveway. It can be topped with a screen or a layer of mulch to discourage weed growth.

If the paving stones are exposed to a lot of sun, they must be regularly rinsed with water to avoid becoming stained. It can be done using a high-pressure hose. It can be done every week in the summer and as needed in the winter.

Keeping the surrounding landscaping in good shape will also help maintain a smooth, clean paver surface. Sweeping the area around the pavers and removing any weeds before heavy rains will help prevent stains from dirt, oil, and chemicals that can damage the surface of the paving stones.

A wide variety of materials are used for driveway pavers. Some are natural stones, while others are made of concrete or brick. Choosing the right type of material will depend on your needs and budget. Some pavers are more durable than others and better suited to high-traffic areas. Some are even designed with drainage in mind. For example, permeable pavers allow water to be absorbed into the ground instead of pooling on top of the surface and flooding.

When deciding on the type of pavers to use, consider the size and shape of the driveway as well as the climate in your area. If your driveway is large, choose larger-sized pavers. It will ensure that the driveway is structurally sound and can handle the weight of vehicles. You also want to ensure no gaps or cracks between the pavers. Otherwise, weeds will grow in these spaces, which can be unsightly and difficult to maintain.

Concrete pavers are a good choice for driveways because they are affordable and highly durable. They are also available in various colors and can be laid in many patterns. However, they are susceptible to cracking and require regular sealing. Other options for paving include cobblestones, flagstones, or mixed pavers. These are more expensive than concrete pavers but can add style to your home.

Pavers are often constructed over a layer of gravel to provide stability. The stone should be evenly distributed and compacted before adding the pavers. After installing the pavers, a final layer of gravel should be added to fill any remaining gaps between the stones. It helps prevent weeds from growing in the cracks and allows easy maintenance.

Before constructing a paver driveway, it is important to check with your local utility company. It will help you avoid striking or obstructing pipes and cables during construction. It is also a good idea to use a professional contractor to ensure the driveway is built properly.

The cost of driveway pavers is a significant factor for many homeowners. They can be more expensive than a traditional concrete or asphalt driveway, but they offer a long-term investment. Pavers can also be used to improve a home’s appearance, adding value and curb appeal.

Pavers are available in various shapes, sizes, and colors to match any house style. They can be installed on multiple surfaces, including concrete, asphalt, and gravel. They are also available in permeable versions, which allow water to flow through the surface and into the ground below. It is especially important in areas with heavy rainfall and flooding.

Compared to poured concrete, pavers are less likely to crack or crumble. However, they require regular maintenance and occasional repairs to keep them looking their best. In addition, a paver driveway can be more difficult to install than a concrete or asphalt driveway because it requires a base layer and an even surface.

A reputable contractor should provide a detailed estimate of the cost of a paver driveway. The price depends on the type of material used, how many pavers are needed, and the space size. It is important to consider the amount of traffic going over the driveway because high-traffic areas require a durable material that can withstand wear and tear.

The most economical paver is concrete, which can be molded into various patterns and offers a wide color selection. This versatile option looks great on any home and can be combined with other materials, such as brick or natural stone.

Other pavers that are more expensive include granite, slate, and bluestone. These are beautiful but costly due to their weight and the need for a large area to quarry them from the ground. They can be arranged in a herringbone pattern to add visual interest and are often paired with a border of different stones.

Another way to reduce the paver driveway cost is to use recycled materials in the construction process. It can save money, help the environment, and reduce landfill waste. However, it is important to check with the manufacturer to ensure the recycled material meets the required specifications.


AC Repair Basics

AC Repair

When a technician comes to perform AC maintenance, they will typically inspect equipment and clean system components. They can also replace faulty parts if needed.AC Repair

However, there may come a point where replacing an air conditioner rather than repairing it makes more sense. For professional help, contact AC Repair North Hollywood now!

The compressor is the heart of an AC system. It’s the part that takes in gaseous refrigerant, compresses it to superheat it, and sends it through the condenser coils. It’s the most expensive part of the system to replace and it can be damaged by mechanical problems, electrical issues, or even just age.

The reciprocating compressor is the most common type of compressor used in home air conditioning systems. It functions like a car motor using a crankshaft to rotate up to 8 pistons inside a block of airtight cylinders. The pistons’ up-and-down movement draws in and compresses the gas before it is superheated.

This type of compressor is more reliable than a hermetic compressor. Hermetic compressors have a one-piece welded steel casing and cannot be opened for repair. They are designed to be replaced with an entire new unit if they fail. Semi-hermetic compressors have large cast metal covers that can be opened and can sometimes be repaired by an experienced technician.

Other types of AC compressors are screw compressors, liquid-ring compressors and polytropic compressors. Screw compressors are often used in commercial building but wouldn’t make sense in a home and use 2 intermeshing screws to draw in and pressurize the refrigerant. A liquid-ring compressor is a good choice in high-pressure applications such as industrial refrigeration. A polytropic compressor has several stages and is designed to operate at different capacities.

When a compressor starts to show signs of trouble, the first thing that a trained professional will do is check to see if the thermostat is set correctly. It’s possible that a simple setting change is all that’s needed to get the AC working again.

Another thing the service tech will do is inspect the suction lines that carry the refrigerant. If the lines are too small they will restrict the flow of refrigerant and can cause leaks. If they are too big, the refrigerant can escape and that’s also a problem that needs to be fixed.

Keeping up with routine maintenance is nearly always enough to squeeze some extra life out of your existing equipment, but there will come a time when repairing or replacing the compressor will be the best option for you and your home. Getting an accurate estimate of replacement costs from an experienced and knowledgeable HVAC contractor is the key to making that decision.

Condenser

The condenser of an air conditioning system is a vital component of any AC unit. It collects and releases heat as it works alongside the compressor and evaporator to cool your space to your exact specifications. When it doesn’t work as it should alongside the other components, your air conditioner will not perform properly.

In addition to its basic function, the condenser plays a big role in how energy efficient your air conditioner is. This is because it is responsible for pumping refrigerant through the air conditioner, which ultimately impacts how much you spend on electricity bills.

Like most parts of an air conditioning system, a condenser requires regular maintenance to ensure it functions correctly. This can be as simple as routine cleanings or as complicated as replacing a fan motor. The key is to have a qualified HVAC technician oversee the maintenance and repair of your air conditioning condenser so you know you are getting the best service possible for your money.

The most common signs that a condenser needs to be repaired or replaced include:

High energy bills: If your air conditioning system isn’t working as efficiently as it should, it will have to run longer and harder to achieve the same results. This will inevitably lead to higher energy costs and a high electricity bill.

Unusual odors: A bad smell coming from the condenser may indicate that there is an issue with the electrical wiring or the fan motor. A professional can determine the source of the problem and remedy it before it becomes worse.

Frequent Blockages: If a condenser coil gets blocked frequently, it will impact the effectiveness of your air conditioning system. It can also cause a buildup of ice on the copper refrigerant tubes. Leaking: Refrigerant leaks are a sign that it is time to replace the condenser coil or entire unit.

If you’re going to do an impromptu maintenance check on your air conditioning condenser, make sure the power is turned off. If you don’t, it could damage your equipment or cause a serious injury.

Thermostat

Your thermostat is the brains behind your HVAC system, keeping track of both your home’s temperature and its overall energy efficiency. A bad or worn-out thermostat can lead to a variety of AC issues, from inaccurate temperature readings to higher than normal energy bills.

Whether your thermostat is manual or programmable, there are some easy steps you can take to ensure that it’s functioning properly. First, make sure that the unit is turned on and set to your preferred cooling mode. Then, if you have a digital or programmable thermostat, make sure that the date and time are correct. Then, if your thermostat has batteries, try replacing them with a fresh set. If this doesn’t fix the problem, it may be time to call a professional.

One common reason for a broken thermostat is that it simply needs to be reset. It is possible to do this yourself by going to your electric panel and flipping the switch that controls your thermostat or HVAC system off and then back on again. However, this should only be used as a last resort and only if you have already tried everything else to repair your system.

If you do decide to reset your thermostat, it’s important to understand that the process can take some time. Most thermostats have a built-in delay that can cause the system to take up to 10 minutes to reboot. This is an important part of the design, as it prevents the system from constantly cycling on and off.

In addition to a faulty thermostat, other reasons that you may need to replace it include the following:

Upgrading to a newer thermostat is an easy DIY job for most homeowners. The only caveat is that you must be comfortable opening up the unit and tinkering with electrical wires. Otherwise, this is a great way to save money and improve the performance of your HVAC system. It’s also an option for those who don’t want to deal with the hassle of paying for a heating and cooling service. Just be sure that you choose a thermostat that is compatible with your system before beginning the installation.

Filters

An AC filter is one of the most critical components in the whole system, as it keeps dirt and debris away from internal AC equipment like the evaporator coils and blower fan. This protects your equipment, improves air quality in your home, and extends the life of your unit. It’s important to change your filters regularly and have them cleaned by a professional at least twice a year.

A dirty filter restricts airflow, which can cause the HVAC to work harder to circulate cool air throughout your house. Over time, this puts a strain on your system and increases energy consumption. If left unchecked, this can lead to expensive damages and premature AC replacement.

If you’re thinking of upgrading to a better air filter, ask your technician for suggestions. They’ll help you find a filter that fits your home’s needs and budget, and they’ll also be able to recommend the right size for your unit. There are many different kinds of air filters, including pleated filters, fiberglass filters, electrostatic filters, and HEPA filters. Each type has its own unique characteristics, but all of them are designed to trap different types of pollutants.

Before you change or clean your filters, it’s important to first turn off the power. This will ensure that you don’t touch live voltage and that dust or other debris won’t be sucked into your unit while you’re working on it. You can usually shut off the power at the unit itself or the circuit breaker.

Once the power is off, you can proceed to remove the old filter. Be sure to have a large garbage bag on hand, as you’ll want to place the dirty filter in it immediately after you remove it from the unit. Doing so will prevent all of the germs, pollen, dust, and other contaminants from recirculating back into your home.

When washing your filters, you should always follow the manufacturer’s instructions. Some filters can be cleaned in the sink using a mild detergent, but other filters should be washed by a professional to prevent damage.

Gelcoat Repair is Easy to Do Yourself

Gelcoat Repair

Many boat owners shy away from Gel Coat Repair because they think it’s a complex and difficult job. However, professional-looking repairs are within reach with the right tools and materials.Gelcoat Repair

A standard gelcoat repair kit contains a mix of pigments and coloring agents to match the gelcoat to your vessel. Before applying any product to a damaged surface, clean the area with acetone.

Sooner or later, every boat owner gets a scratch, gouge, or chip in their gelcoat. It isn’t always a big deal, but it makes the pride of ownership take a hit, and it can be unsightly. Often, this damage is caused by hitting your dock, other vessels, or even just bumping into something on the boat. This can be a good time to think about getting a professional to do the repair. But in the meantime, a few simple steps can make the damage almost disappear.

Start by wiping down the damaged area with acetone to remove surface dirt and waxes. This will give your new gelcoat a better bond with the damaged areas.

If the scratch is fairly deep, a good epoxy filler can be used to create a solid surface. This will prevent water ingress in the future. If it’s just a shallow nick in the gelcoat, however, there’s no need to use any resin, and it will probably be OK to wet sand the area and polish it with rubbing compound.

For any deeper scratches, it is important to open up the area a little. If you simply paint over them, the gelcoat resin will bridge the scratch, and you’ll end up with a patch that doesn’t blend well into the rest of the color on the boat. So draw the corner of a screwdriver or scraper down the scratch to open it up a little.

Once the scratch has opened up a bit, wet-sand it with 220-grit wet-or-dry paper. This will be a bit rough on the surface, so wear cloth garden gloves (the kind with hard dots to save your fingertips). Wet the sand with the grain, making sure you are using a flat block, and keep a trickle of water running over it. If you use a high-quality wet or dry sanding system with a sanding block, the final appearance will be as smooth as new.

Then, when the new gelcoat has fully cured, paint it with your color-matched gelcoat. If the gelcoat color is a little off because it has been exposed to sunlight over time, you can use a bit of rubbing compound on a soft cloth to buff the area a few times until it matches.

Chips

While they are not as common as dents or scratches, chips in gelcoat should be repaired as quickly as possible to prevent water from entering and potentially damaging the fiberglass structure of your boat and rusting metal components. A good gelcoat repair kit (different brands are better suited to different types of repairs) will include all the products you’ll need. Be sure to follow all the safety instructions that come with your tools and products, especially when handling rubbing compound or paint stripping chemicals.

To repair a chip in your gelcoat, first mix up some of the resin or hardener you have purchased with the catalyst to make a paste. Use a putty knife to spread the paste over the damage. Be sure to overfill the area; gelcoat shrinks as it cures, so you’ll need the extra thickness of the filler to prevent a void later on. Once you’ve filled the chip, force out any air holes with a putty knife and seal the area from the air with either a PVA curing agent or a piece of Saran Wrap or wax paper. Gelcoat does not cure properly if exposed to air, so the sealed area will help your repair last the lifetime of your vessel.

Next, sand down the area of your gelcoat repair until it is flush with the surrounding surface. Start with 180-grit waterproof paper wrapped around a block, then move up to 240-grit and finally 400-grit for a smooth finish. Once the area is smooth and hard, remove the masking tape and plastic sheet, then buff the area with a buffer until it is shiny and blends in well with the surrounding area.

You can also polish a gelcoat repair to make it shine, though if your repair is in an area that sees lots of flexing (such as the corner of a deck hatch), this might not be the best idea. A polish might cause the fiberglass to flex too much, leading to stress cracks. Stress cracks are the most serious type of gelcoat damage. They usually show up as fine hairline cracks, but if left unchecked, they will grow into full-blown spider or star cracks that can compromise the structural integrity of your boat.

Cracks

While most scratches and chips are cosmetic issues caused by impact with hard objects like winch handles, downrigger weights, or 15-pound lobsters, cracks in the gel coat can be a sign of serious structural problems with the fiberglass or the boat’s construction. It’s important to fix these cracks as soon as possible. Cracks that are left untreated can allow water to seep into the fiberglass and rust the metal components underneath.

Cracks are easier to fix than chips, as you do not need to remove any of the damaged gelcoat, but you do need to clean the area around the crack and wash it to make sure it’s free of dirt and grease. Then you need to choose the correct kit to repair your gelcoat. Different kits have different components, including bases, pigments, catalysts, and cleaning solvents. Once you have chosen the product you need for your repair and mixed the base and catalyst to the proper ratio, brush on the gelcoat and spread it with a small wood or plastic putty knife. You should have about a 15-minute window of working time after adding the catalyst before it starts to set and harden. Make sure the gelcoat is a little higher than the surrounding surface to allow for sanding. Once it is completely dry, sand with 220-grit wet sandpaper or, for a really smooth finish, 400- or 600-grit.

When filling a crack, be careful not to overfill it, as the gelcoat will shrink as it cures and leave a gap underneath. Use a plastic putty knife with a sharp, clean edge to avoid pulling out any of the gelcoat as you fill it. You should also cover the repaired area with a piece of Saran wrap or wax paper to prevent air from getting into the gelcoat as it cures. Once cured, the repaired gelcoat should be sanded smooth with 220-grit sandpaper, then wiped down and sprayed with a top coat of high-quality marine polish. This is the only way to guarantee your gelcoat repair will last as long as possible. By following these tips and using a quality gelcoat repair kit, you can extend the life of your boat’s gelcoat.

Wet-Sanding

Wet sanding gelcoat uses the same process as dry sanding but with water. This softens the abrasive and prevents dust buildup. The water also lubricates the paper, making it easier to work with and providing a smoother finish. Wet sanding is particularly helpful for removing gelcoat that has oxidized or faded. This is a deep effect that cannot be corrected with polishing alone, as it goes beyond merely dulling the surface.

A good wet sanding system begins with testing the gelcoat texture and degree of thickness to determine which type of sandpaper is required. Each gel coat has a different texture, so it’s important to choose the right grit of sandpaper to avoid damaging the surface of your boat. Often, soft gelcoat will choke DA pads quicker than harder or brittle materials, so it’s advisable to start with the lowest possible grit and move up only when it becomes obvious that no progress is being made.

Once the area to be repaired is sanded down to the bare fiberglass (using 120-grit hand sandpaper on a block), it’s time for some wet sanding. Begin with 320-grit wet or dry paper and dip it frequently into water to keep it clean and lubricated for easier work. Move the sandpaper over the damaged areas with moderate pressure until the scratches left behind by the coarser abrasive papers have disappeared.

Stucco Removal – How to Prepare for Stucco Removal

Stucco Services

If your stucco siding starts to look dirty and worn, you should remove it. The textured surface of stucco makes it easy for dust and dirt to build up, and it can also attract mold and mildew. Stucco can also deteriorate from water seeping through it, which can cause a lot of damage to the walls of your home. This can lead to structural issues and mold growth.

Stucco Services
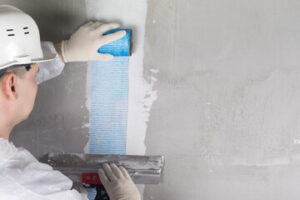
Removing stucco can be a difficult and time-consuming process. Hiring a professional Stucco Repair Philadelphia who is experienced and equipped with the necessary tools and equipment to complete the job safely and efficiently is important. Stucco removal may also be necessary for building renovations or upgrades or to replace stucco with a different exterior finish. A reputable stucco removal contractor can help assess the needs of the building and provide guidance on the best course of action for stucco removal and replacement.

Stucco removal is a process that occurs when a property owner wants to change the look of their building or when damage has occurred and stucco must be removed to protect the structure from further damage. It’s a fairly easy process that involves workers loosening a small area of stucco with a hammer and then using a chisel or a pry bar to remove the stucco.

To make this process easier, a contractor should prepare the surface by removing any furniture or other items that can be moved away from the wall and by placing a tarp beneath the work site to catch falling debris.

It’s important to wear safety goggles and gloves when working with stucco. This will prevent fragments from entering your lungs. It is also important to make sure the area is well-ventilated during the removal process.

The stucco wall system is susceptible to many damaging conditions, from UV rays to moisture to installation errors. These conditions can lead to fading, cracks, discoloration, and even mold.

In order to determine if you need repairs or remediation, it is important to know what the warning signs are for your stucco wall system. Look for small cracks and gaps around your windows and doors that could indicate moisture or mold.

Oftentimes, these are signs that the damage is surface level. However, it is always a good idea to have a professional inspect the stucco for underlying issues.

After thoroughly cleaning your stucco, you should apply a new coat of paint to the stucco in order to protect it from further damage. If you live in an area with harsh weather conditions, you might want to consider applying a quality paint that is specially formulated to prevent color fading.

After stucco removal, it is important to make sure the area is clean. This is because debris can get into cracks and holes in the stucco, which could lead to mold or mildew.

A good way to ensure the stucco surface is completely cleaned is to use a concentrated cleaning solution. These solutions can be found at home improvement stores and are effective at removing stains caused by dirt, grime, mold, and algae growth.

However, it is important to note that some of these cleaners may need to be mixed with bleach to effectively eliminate stains caused by mildew and mold. Always follow the manufacturer’s instructions for mixing these products.

Another method for ensuring the stucco is fully cleaned is to use a power washer. This is a safer way to clean the exterior of your house, but you should be careful not to use too much pressure on the surface.

Whether you are doing it yourself or hiring someone else, there are some things that you can do to prepare for the work ahead of time. This way, you can get everything done properly and avoid any problems down the line.

Before the stucco removal process starts, it is important to do a thorough inspection of your home’s exterior. This will ensure that you do not accidentally damage your siding, which can lead to more expensive repairs in the future.

For example, if you notice that there are spider cracks or any other signs of deterioration, you should get them taken care of as soon as possible. If they are not, they can cause significant damage to your home and its foundation.

Stucco can also have a negative effect on your home’s exterior by attracting unwanted dirt and debris. This can cause a variety of problems, including mold. To help prevent this, check your windows and door frames for any small gaps that could allow water to penetrate.


Types of Interior Painting

Painting Services

There are many different types of paint you can choose for your home. This includes matte, satin, flat, eggshell, and gloss. Each type has its own set of advantages and disadvantages. However, there are a few things that are common to all types.

Painting Services
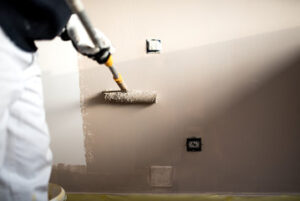
When painting your home, choosing the right type of paint for your project is important. There are two main types of interior paint – flat and matte. Each has its advantages and disadvantages. The most obvious advantage of flat paint is its ability to hide wall imperfections. Flat paint can conceal scratches, scuffs, and other surface imperfections. This makes it a viable option for rooms that see little traffic.

While flat paint is a durable finish, it is not a particularly hygienic one. If you are planning to move furniture or other items, you may want to use a different type of paint. In addition to being a less hygienic choice, there are better options than a flat paint for rooms with a lot of humidity or moisture. Moisture can cause a variety of problems, including mold and mildew.

High-gloss paint is one of the most durable finishes. It’s also a great choice for areas subject to water and humidity. These include doors, ceilings, molding, and woodwork. A gloss finish can brighten a room and make it look larger. But you don’t need to choose this type of paint for every room in your home. Instead, you can use texture and color to create an overall dimensional look. For a more rustic feel, try using a flat or matte finish.

Another type of paint that’s popular is satin. This gives a more velvety look that’s perfect for bedrooms or high-traffic areas. Satin is available in latex and oil-based varieties. You can also try a low-gloss finish. These can be applied by brush, roller, or spray. Low-gloss finishes don’t have the luster of a gloss finish, but they do have good cleaning properties.

Satin interior painting can be a great way to create a more luxurious look. However, there are many factors to consider. You should consider the size of the room and what you want the finished product to look like. The shine that satin paint generates is great for bouncing light around a room. It also helps to create a more open feeling. Although satin paint is not as shiny as semi-gloss or eggshell, it does have some of the same characteristics.

Another good thing about satin paint is that it resists chips better than flat paint. It’s also easier to clean than other types of paint. This makes it a great choice for areas that get a lot of traffic. In addition to its durability, satin paint is also resistant to moisture and mildew. This makes it a great choice for bathrooms and kitchens.

Choosing the right interior paint finish can make or break your home’s appearance. You have three main types: flat, matte, and gloss. Which one is right for you depends on many factors. Eggshell paint is a popular choice for painting trim. It offers a durable, washable surface that resists stains and scuffs. However, it could be better for kitchens or bathrooms. This type of finish is also not suited to high-traffic areas.

Eggshell is less expensive than higher-end finishes, but it still costs a little more than flat paint. Eggshell is a good option if you are looking for a durable, easy-to-clean finish. But you should consider another finish if you want a finish that will stand up to frequent touch-ups. Satin is another finish that is a great alternative to eggshell. The satin sheen has a velvety, pearl-like effect, and it is easier to clean than flat or matte finishes.

For interior walls and ceilings, matte paint effectively creates a modern and cozy look. Unlike gloss, matte paint does not reflect light. Instead, it absorbs it. Its soft and velvety texture makes it perfect for any space. Matte paint is ideal for low-traffic rooms and accent walls. It is not recommended for high-traffic areas such as kitchens and bathrooms. However, it works well for guest rooms and attics.

Regardless of how matte or glossy you choose to paint your walls, you want to create a clean, seamless transition. If you have a lot of traffic, choosing a finish reflecting light is better. Glossy paints will show up dirt and grime. On the other hand, satin finishes are easy to maintain and wipe off.

House Exterior Painters

Painting Services

House exterior painters are professionals who know how to apply paint to your house’s exterior. Not only do they make your home look great, but they can also add value to it. There are a few things to keep in mind when choosing a painter, including the cost and how the paint will affect the value of your home.

Painting Services
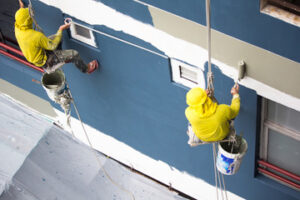
One of the most important criteria a potential buyer looks at is the appearance of a home. Paint can be an important part of the visual appeal of your home, and it can help to attract potential buyers. A well-painted house will look cleaner, more attractive, and more inviting. This can make a difference of thousands of dollars in the overall sale price. If you’re looking to increase the value of your property, it might be time to hire Painters.

Preparing the surface before painting. Painting the exterior of your home is a large project. It is best to prepare the surface before the paint job begins. They know how to prep the surface properly. This process makes painting easier and ensures the quality of the final product. The process involves removing debris and other items that are in the way of the paint. It would be best if you started cleaning the surfaces, including the windows. You should sand and clean the surfaces for metal to get rid of any rust.

Painting the exterior of your house can be a very expensive project. The cost is dependent on several factors. Some of these factors include the style of the home, its location and the amount of preparation work that needs to be done. Estimating the cost per square foot before you begin painting is important. For the most accurate price per square foot for a house exterior paint job, use a company that has extensive experience. They should be able to provide you with an estimate based on the information you provide them.

Typically, you will need to provide information such as the number of floors and doors. If you live in a two story home, you’ll also need to factor in the cost of scaffolding. Also, you’ll need to determine the number of gallons of paint you’ll need. Buying in bulk is a good way to save money. A professional painter can charge from $20 to $50 per hour for labor, plus materials. This cost is often significantly more than the cost of doing the work yourself. However, a professional can save you a lot of time.

In addition to preparing the surface before painting with house exterior painters, you can also use a pressure washer. You should also use primer before applying the color coat. It will provide an invisible base layer that will help your paint adhere to the surface. Also, you will need to repair any cracks or holes in the surface. If the surface is very old or has extensive damage, you may need to hire a professional. However, professionals should only do power washing because it can damage your walls.

Choosing the best paint for your home. It can be challenging to decide which one to buy. A good rule of thumb is to stick with one color. However, you can make your life a whole lot easier by buying your colors in bulk. There are plenty of reputable online retailers where you can find cheap paint by the gallon. The best part is that you can get your home redone before you know it. So what are you waiting for? Whether you want to resale your place or make it more livable, it’s time to get painting. And you’ll be rewarded with a more colorful place to live. Now, heed these tips to avoid a paint job that goes south and make it last. Make sure to do your homework first. Choosing the best paint for your home is a serious decision, so do your research before you embark on the process. You don’t want to regret it for years to come.

One of the easiest ways to add value to your home is to re-paint the exterior. Adding new paint to your home will help to increase the appearance of the entire structure and can even boost your asking price. In fact, most homeowners will repaint their home when they put it on the market. The International House Painting Association conducted a survey of consumers to determine how much repainting can increase a home’s value. It was found that black painted doors added 2.9% to a home’s value. However, it’s important to consider the type of paint you want to use and how you will apply it.

Power Washing – How to Get Rid of Unwanted Graffiti on Your Exterior Walls

Pressure Washing

Power Washing is a great way to get rid of unwanted graffiti on your exterior walls. Power Washing San Diego is a process that consists of using heated water to remove stubborn graffiti ink and spray paint. You can also use this method to clean your home and create a healthier environment for you and your family.

Pressure Washing
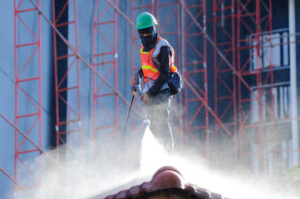
When you use hot water for power washing, you will likely wear out your wooden deck, and perhaps you will even warp your masonry. However, the power of the water itself makes it a viable option for a variety of tasks. The heat helps the water penetrate the grime at the molecular level. This means it can be used to remove paint and dirt from wooden surfaces. Also, when it comes to cleaning oil, it is important to use hot water because it allows the cleaning agent to work more efficiently.

It is also possible to achieve the same results using cold water. You can clean grease and mildew from the surface of your home, or you can even remove paint that is on your fence or garage parkade. Cold water is also great for removing thick dirt. Using a pressure washer is a good option for deep cleaning your home.

There are many types of power washing machines, from handheld to large-scale. Choosing the right one for you will depend on your needs. Having a machine that has the capability to reach up to 2,000 pounds per square inch will give you plenty of cleaning options.

If you are trying to remove stubborn graffiti ink or spray paint, you should know how to apply the right cleaning solutions. Using the wrong solvent can ruin your work project. But you also have to use the correct technique and mode of application. Some of the best solvents are water-based, while others are oil-based. You can also choose the kind of surface you are working on. Some surfaces will not be affected by chemical removal solutions.

Naphtha, for instance, is a petroleum solvent that dissolves dry and wet paint. It is more effective than mineral spirits, but not always a good choice for stubborn graffiti. This solvent is also a bit more volatile than mineral spirits, so you should use it in a well-ventilated area.

Denatured alcohol is a good choice for removing spray paint. If you have a stubborn area, you might also want to try white spirit. However, keep in mind that white spirit can leave behind a grease residue. So you’ll have to use a low-nap rag with each wipe.

Creating a healthier environment for you and your family. If you’re looking for a way to create a healthier environment for your family, then you should consider power washing. It’s not only an effective method of cleaning your home’s exterior, but it can also prevent breakdown of surfaces. Power washing can also add to the curb appeal of your property and is a great way to extend the life of your deck, siding, pavers and driveway. With the proper power washing service, you’ll be able to clean your home without using harsh chemicals.

When it comes to your health, power washing can help you and your family get rid of dangerous mold and mildew. The water used for power washing is safe for pets and your plants, and it can’t harm your garden. Also, it can help you to remove slippery coatings from your home’s exterior.

Before you use a power wash to remove graffiti, you must know what type of surface you’re dealing with. Different materials react differently to different cleaning agents, and choosing the wrong one can damage the surface. For instance, if you have a delicate surface, you’ll need a gentle brush to avoid damaging it, and you should only use mild detergent. On the other hand, a hard surface like concrete can handle any cleaning agent and isn’t damaged by high pressure.

First, spray graffiti removal solvent on the surface to loosen it. If the graffiti is stuck to the surface, you should scrub it off manually. You can use a pressure washer if you can’t get the graffiti completely off. The water pressure that a power washer uses is rated in pounds per square inch, so it won’t damage the surface too much.

Graffiti is a form of vandalism and can be a real pain to remove. It can range from simple phrases and letters to complex murals. The best way to remove graffiti is to do it as soon as possible. Otherwise, the process will take a long time and may even cost you a lot of money.

How to Find a Roofing Company

Roofing Company

If you have been considering replacing the roof on your home, it is important to find the right roofing company. A quality roofing company should be able to take care of your needs with ease.Roofing Company

If you’re running a Roofing Company there are several options for accepting credit and debit cards. You can opt for a mobile payment processing company, a standalone credit card terminal, or a combination of both. You should build costs into your operating budget and take advantage of the latest technological advancements.

Credit and debit card is one of the easiest and most effective ways to collect payments from customers. It also has the added benefit of making it easier for you to process the transaction. However, accepting cards is not an easy task. You’ll need to buy the right equipment and establish a merchant account.

The credit card reader is a convenient and affordable option. In addition to the credit card reader, you’ll need a processing app. You’ll pay a nominal fee each time you make a sale, but you’ll be saving money in the long run.

Creating a social media account for a roofing company is not always the easiest task. However, it is a great way to promote your company to the next level. Having a social media presence can help you attract new clients, build relationships with current clients, and gain more recognition.

You should start by creating a digital portfolio. This is a collection of informative content that can be shared on social media. This could include videos, photos, and before and after pictures.

You should also think about your ideal customer. Your target audience should have a specific set of interests. They should know what questions to ask and what kinds of content they are looking for. You should be willing to answer their questions and respond to reviews.

Search engine optimization (SEO) for roofing companies is an effective method for generating leads. It helps to get roofing websites listed on the first page of Google’s SERPs.

The best SEO strategy for a roofing company will include a combination of on-page and off-page tactics. These strategies will help optimize the website’s content and technical elements. On-page SEO includes creating keyword-rich content for each page of your website. It is important to include these keywords in both the title tags and the body of each page.

Roofing SEO can also include internal and external link-building. This means adding links to your website from other credible sites. These citations are considered by Google as votes of confidence and will increase your chances of appearing at the top of the search results.

If you are a roofing company looking for a good way to market your products and services, you might want to try attending a home show. These are events where you can meet with prospective customers, see new products, and compare products and services. This is one of the best ways to get your name out there and get new leads.

There are many home shows happening in the Tampa area. If you are planning on attending, make sure to get a map and attend the show at the right time. You don’t want to waste your time at a show that doesn’t suit your needs.

A home show is a great opportunity to learn about new products, services, and tips and tricks that might be useful to you. It also offers a great chance to talk to professionals in the industry and ask questions. You will even find some raffles for discounts and free items.

Getting a roofing quote is a critical step in any roof repair or replacement project. It’s important to find a professional roofing contractor who can give you an accurate cost breakdown, explain the labor and materials involved, and make sure you’re protected. It’s also a good idea to get quotes from more than one company, so you can compare like for like.

If you’re unsure of what to look for in a roofing quote, it’s a good idea to do some research. You can get an idea of what’s available by asking friends and family for referrals, visiting the Better Business Bureau, or looking for customer reviews on sites such as Google Reviews and Yelp. Be wary of contractors who offer low bids. They may be trying to cut corners or do substandard work. They may also be uninsured.

Have Questions About Real Estate Investing? Find Answers Here

Have you thought about real estate investing? You might have watched television shows on TV about house flipping and making profits. Continue ahead for more tips!


Do proper research before real estate investment. Look at between 50 and 100 properties in the area you’re interested in, and keep notes on it. Things to list include current pricing, projected rent earnings, and current prices. You can easily see which deals are good investments and which are not.


Always try to find out what the local values. Finding out the average rental rates and whether they rent or own can provide an idea of the neighborhood.


Find like-minded people and see if they will help you. There are lots of people that want to get into investing in real estate. There are many groups formulating in your area that focus on real estate investing. If you can’t find one nearby, consider checking online for forums. Get out there and learn from your peers.


Be certain you spend enough time on the business and also learning about how it works. You might have to curtail your time spent on other activities that could cost you later. Ditch poker night or softball league that you have more time to hone your investing skills.


There are a couple of things to look for when purchasing property. You want to make sure that you get a fair deal on the land. Do not pay too much for the business either. You need to be sure both numbers are good enough to make a final purchase worth your while.


Be certain to choose investment properties that are in a well-known area in which potential tenants might be interested. This will maximize the resale value that you get when selling. Try looking for properties that can be kept up easily.


If you are thinking of renting out your investment property, carefully check out each potential tenant. The individual should be able to pay both the first month along with a deposit. If they can’t get that kind of money together at the start, they are likely to have problems paying rent too. Keep searching for a better tenant.


Real estate investing can make you feel financially powerful. Because you’re picking out what property works well for you, it helps you be in control of what’s going on. It’s time for you to use these tips to get yourself started out as a real estate investor.


You can also visit our other website and post your article.

Rusa Medical Centre, Always Stampin, How To Build A Virtual Assistant Business, Puget Sound Silent Flyers, Bellanova Travel, San Luis Coastal Measured, Electrician-Fortlauderdale, Smerise Collective, Set Pump Fast, VOR Business Training, New Americans Alliance, Vivid Painting LLC, Long Horns Shop, Kitchen & Dining, Product Launchr, Poshe Shop And Ship, Mcarpenter Md, Green Home Builders Of The Triangle, Eartheries, Rebecca Elbaum, Chuckheiney, Scotts Valley Town Green, Germ Tackle, NWP Collection, Freedom Sings Colorado, Organic Gardens Today, Peak Oil NYC, Mexico Infrastructure Projects, Divine Appetite Cafe, Chuva Group, Internet Marketing Here, Sagewood Kitchens, Wyoming Switchboard, Embroidery By Ace, Charleston Your Home, Yard Cardz, Liberty Mutual Research, ISCEBS-Iowa, NJ Dare Officers, Dream Sleep Now